|

ADIRONDACK ROCKING CHAIR PLANS
Muskoka Rocker Plans
| PLEASE NOTE: My chair is made from pine, and a few Customers have had
issues with the chair leaning forward more than mine did in step #23. If you are using heavier, more dense stock,
you may have to adjust the legs on the rockers to compensate for the weight of the front legs and arms. Some Customers
have easily resolved this by lowering the back legs and support if needed. Please see alternate notes in Step #7,
8 & 16. |
Materials List
| 3/4" x 9.5" (1.9cm x 24.2cm) redwood, cedar or pine boards. Four
to six, 8' (2.44m) boards should make one chair depending on knots and layout. |
| 1 1/2" x 9 1/2" (2 x 10) (3.8cm x 24.1cm) for the rockers, or
extra 3/4" (1.9cm). One 8' (2.44m) depending on knots. |
| 1 1/4" x 5 1/2" (3.2cm x 14cm) matching wood for front legs. 4'
(1.2m) for one chair |
| 1/4" x 3.5" x 48" (.6cm x 8.9cm x 1.2m) hardwood for runners. 2 pieces needed. |
| 2, 5/16" x 2" (8mm x 5cm) carriage bolts, nuts, washers and lock
washers. |
| 4, 5/16" x 2 1/2" (8mm x 6.4cm) carriage bolts, washers and lock
washers. |
| 50, 1 1/2" (3.8cm) exterior wood screws |
| 8, 2" (5cm) exterior wood screws |
| 6, 3 1/2" (8.9cm) # 8 wood screws |
| 8, 3" (7.6cm) # 6 wood screws |
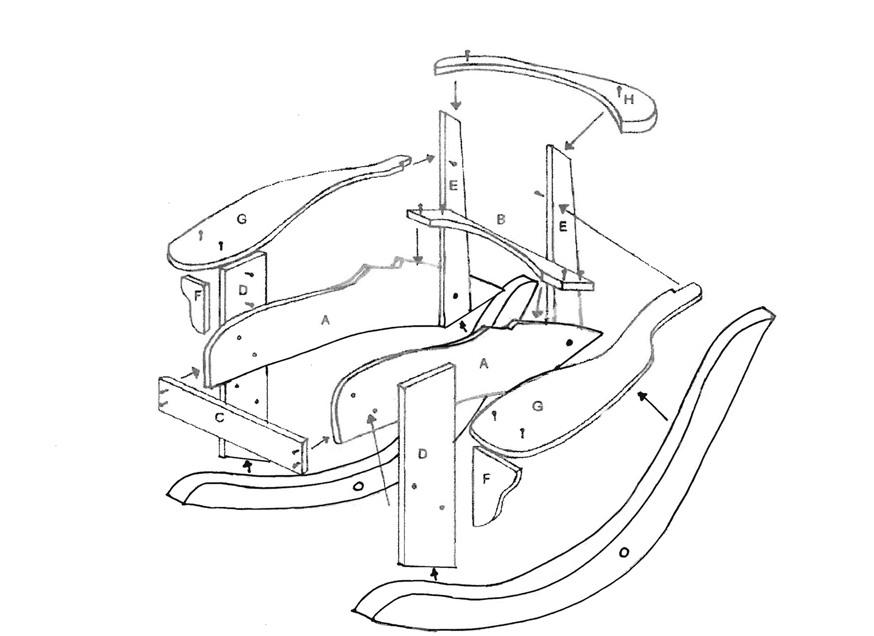
Parts List (the
measurements for the templates are listed below, but it is not recommended that you cut your stock to these lengths
first, but trace the patterns onto the stock for best use of space)
| Part |
Description |
Quantity |
Size (standard) |
Size (metric) |
| A |
Side panel |
2 |
31" x 5 7/8" x 3/4" |
78.7cm x 14.9cm x 1.9cm |
| B |
Bottom back support |
1 |
21" x 3 3/8" x 3/4" |
53.2cm x 8.5cm x 1.9cm |
| C |
Front seat slat ( straight cut, no template needed ) |
1 |
21" x 2 5/8" x 3/4" |
53.2cm x 6.7cm x 1.9cm |
| D |
Front leg |
2 |
20 3/8" x 5" x 1 1/4" |
51.8cm x 13.0cm x 3.2cm |
| E |
Back support |
2 |
30 1/2 x 3 5/8" x 3/4" |
77.5.0cm x 9.3cm x 1.9cm |
| F |
Arm support |
2 |
6 1/2" x 4 1/4" x 3/4" |
16.5cm x 11.0cm x 1.9cm |
| G |
Arm |
2 |
29 1/2" x 7 3/8" x 3/4" |
74.5cm x 19.0cm x 1.9cm |
| H |
Top back support |
1 |
21 3/8" x 4" x 3/4" |
54.0cm x 10.5cm x 1.9cm |
| I |
Center back slat |
1 |
35" x 3" x 3/4" |
89.0cm x 7.7cm x 1.9cm |
| J |
Second back slat |
2 |
34 3/4" x 3" x 3/4" |
88.5cm x 7.7cm x 1.9cm |
| K |
Third back slat |
2 |
33 7/8" x 3" x 3/4" |
86.3cm x 7.7cm x 1.9cm |
| L |
Outer back slat |
2 |
32" x 3" x 3/4" |
81.7cm x 7.7cm x 1.9cm |
| M |
Seat slats ( straight cut, no template needed ) |
7 |
21" x 1 3/4" x 3/4" |
53.2cm x 4.5cm x 1.9cm |
| N |
Back seat slat |
1 |
21" x 3 3/8" x 3/4" |
53.2cm x 8.5cm x 1.9cm |
| O |
Rockers ( see construction options in step 14 ) |
2 |
37" x 3" x 2 1/2" |
94cm x 7.7cm x 6.4cm |
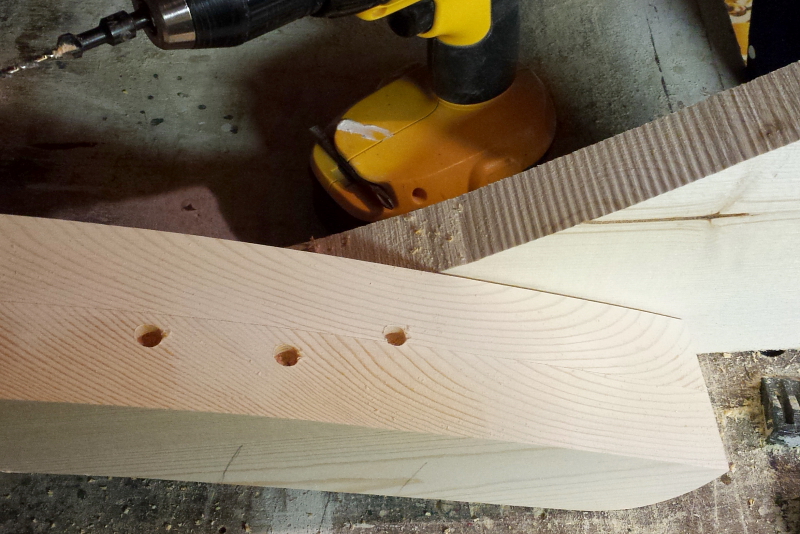
Templates & Drilling: (click on the images below, for expanded views through your browser)
 |
|
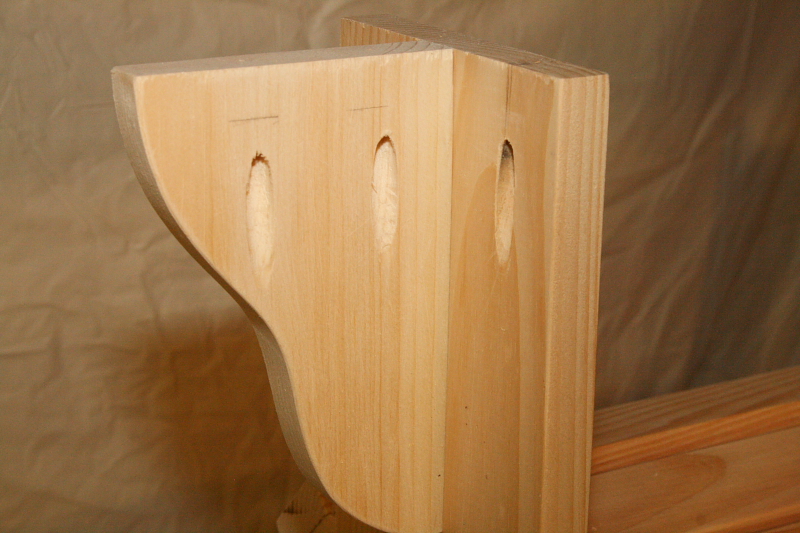
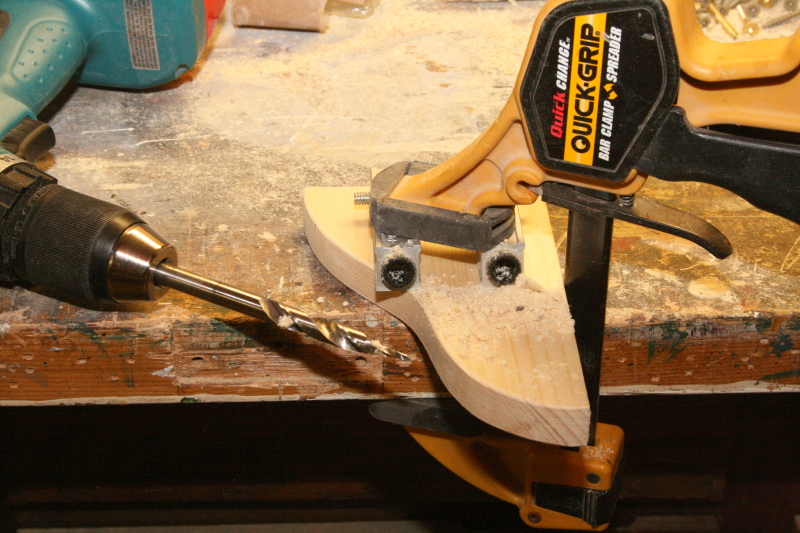
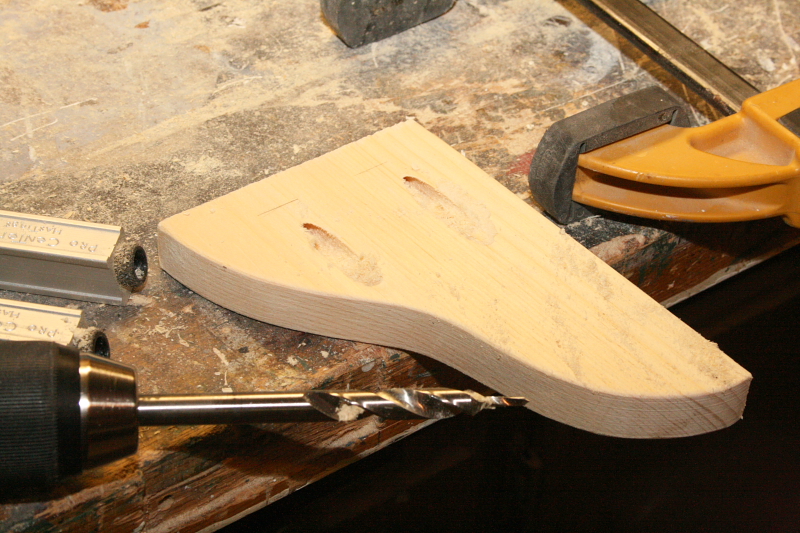
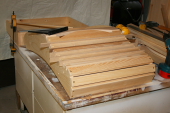
1
-Cut out all templates, and trace or spray glue onto 1/8" (3cm) hardboard for permanent templates. Cut out,
sand the edges smooth, & label all pieces. Trace all templates onto the final stock of pine or cedar, and cut
each one out with a sabre, table, or band saw. Double check the dimensions from the sizing chart. If you have a
jointer/planer, you may want to clean up all straight edges. Any curved surfaces should be sanded with a drum sander
before rounding over all outside edges, with a router or sandpaper. Using
a 5/16" (8mm) bit, clamp the duplicated parts together, and drill the holes for the legs and back supports. |
| |
|
|
 |
|
2 -
A taper jig on the table saw, works best for the back slats and back supports E. A shop built sled
is the quickest, easiest and safest taper jig. Use a scrap length of 6" (15.8 cm) wide plywood, longer than
back slat I, and fasten clamps at each end. Extend the pattern lines to be cut, to the ends of the
board using a straight edge. Line up the pencil marks with the edges of the sled and run it through the blade. |
| |
|
|
 |
|
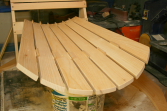
3
- For all back slats, cut to the rough dimensions of part I, the longest slat. Then trace on template I, and
taper the one side for all parts I, J, K &
L. The templates for J, K & L
can be traced onto the tapered stock, so all parts are the same width at the bottom. Only one template of each
is necessary. Just flip each over for the opposite direction of the curve. When you have cut & planed or sanded
all slats, assemble & clamp as shown, so you can sand the curve smooth and even.
Page 1
|
Assembly: (click
on the images below, for expanded views)
 |
|
1
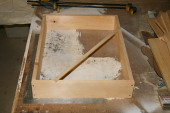
-If you are building a few chairs, you may want to begin assembly
by using scrap boards to make an assembly box to clamp parts A, the side panels, to make it easier to attach part
B & C, so
the frame is square. Mine is 4" (10.2 cm) high by 24" (61 cm) long.....the important dimension is the
width of 19 1/2" (49.6 cm). When you clamp parts A to each side, it will equal the 21" (53.4 cm) width of parts B & C as well as all the
seat slats. |
| |
|
|
 |
|
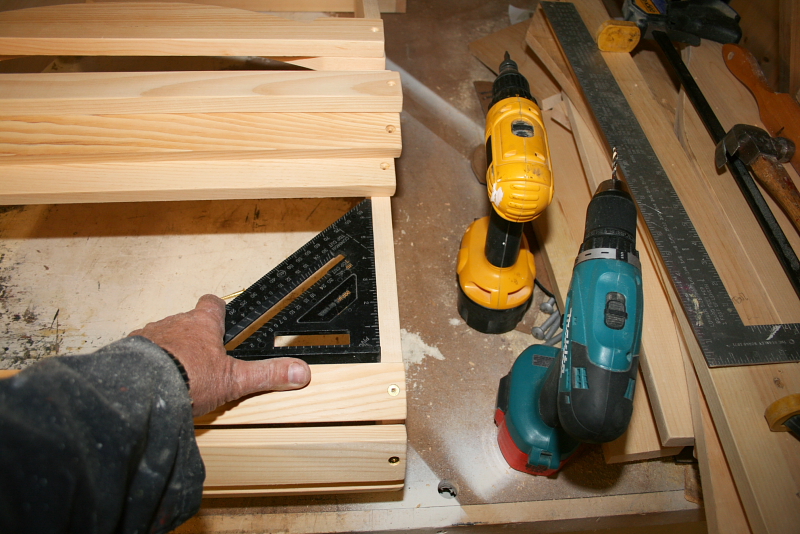
2
-This is an alternative option using standard assembly squares and
clamps.Clamp parts A
to your assembly squares, being sure that the fronts are even and square. Raise the parts at the front with a board,
to ease in screwing on part C. |
| |
|
|
 |
|
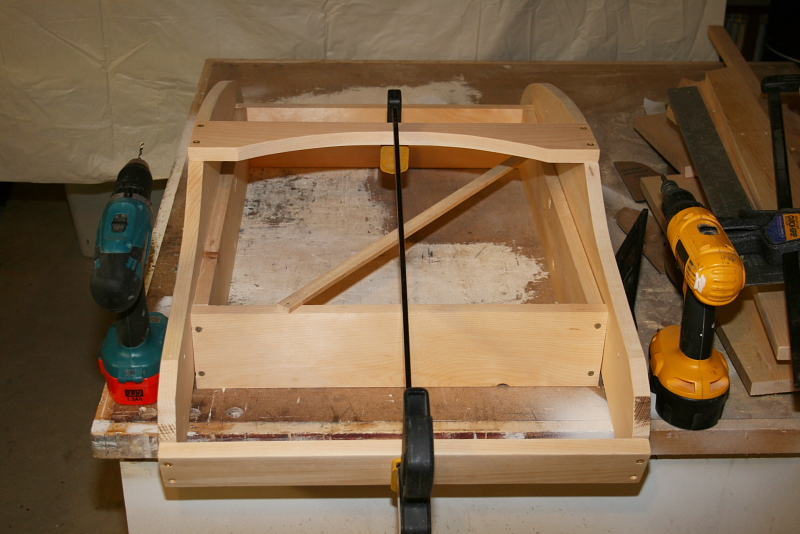
3 - Begin assembly
by screwing the bottom back support part B, to the slot in each part A, the side panels. Use 2 screws on each side of part B using the hole locations provided on
the templates. Be sure to drill pilot holes into parts A. |
| |
|
|
 |
|
4 - Next attach the
front slat C,
with 2 screws on each side, to the front edges of parts A, flush with the bottom edges. This will give you a carcass to work with. Double
check for square by measuring corner to corner, both ways. You can now remove the clamps and assembly square. |
| |
|
|
 |
|
5
- Using a square, screw one of the seats slats M above part C, so it is even with the upper edges
of the pattern on parts A.
This will leave a 3/16" (5 mm) space. Do the same for the next slat. All slats are 21" x 1 3/4"
x 3/4" (53.4 cm x 4.5 cm x 1.9 cm), and templates are not required. |
| |
|
|
 |
|
6 - The rest of the
seat slats can now be assembled and attached using one screw on each side. Evenly space all slats M using 2 strips of 1/8"
(3 mm) hardboard as spacers, or one strip of 1/4" (6mm). Add part N, the back seat slat. The spacers should evenly space all slats back to part B. Be sure to double check the
squareness when screwing in each slat. |
| |
|
|
 |
|
NOTE: Only drill the upper bolt hole at this time, so
the front legs will pivot during final balancing. Once level, drill and insert the second bolt. The same may apply
to the back bolt if you have changed any stock or thickness.
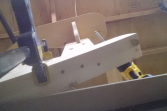
7 - Next,
bolt on the front legs D,
on the OUTSIDE
of parts A.
Use washers on the insides and hand tighten for now, to allow some movement when attaching the rockers. Use the
2 1/2" (6.35cm) bolts. |
| |
|
|
 |
|
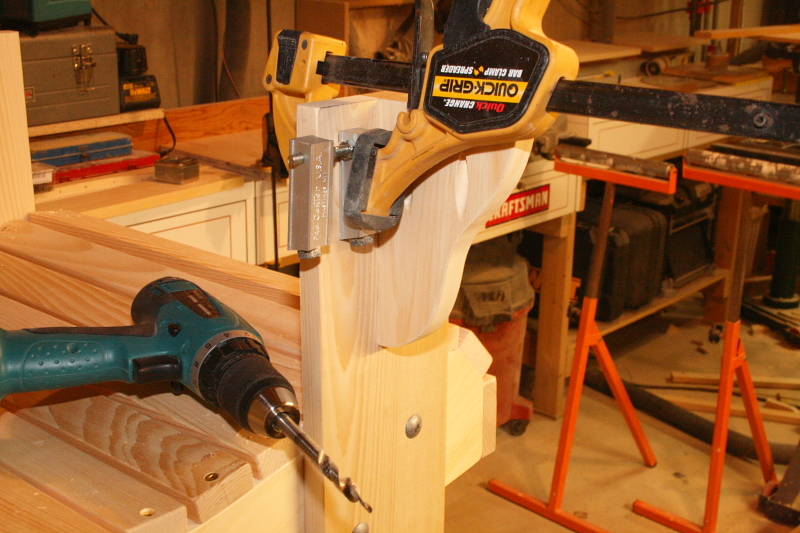
8
- Bolt the back supports E, on the INSIDE of side panels A, being sure they are flush to the mated bottoms of the side panels parts A.
NOTE: You may want to clamp the supports in place for now, while assembling
the rest of the chair, as you may need to shave the underside while balancing on the rockers. Remove the clamps
prior to balancing, then drill the holes for the bolts.
|
| |
|
|
 |
|
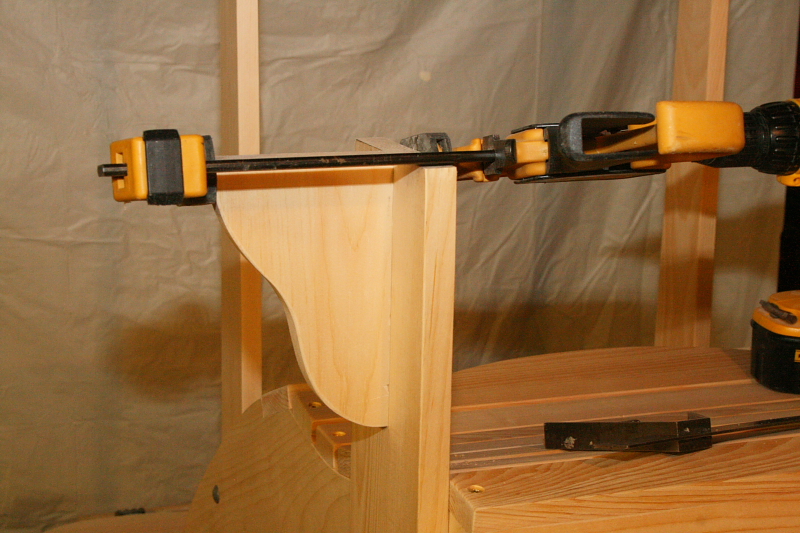
9
- Screw on the upper back support H, centered on the tops of parts E, flush at the front with supports E. Use an 18" (45.7 cm) scrap spacer, as shown, to be sure the back supports
are paralell to each other. |
| |
|
Page 2
|
| |
|
|
| |
|
|
| |
|
|
 |
|
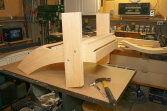
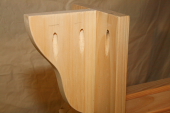
10
- With two screws, attach the arm supports F, centered flush with the top of the
front legs D.
If you have a pocket screw kit, you may want to follow the images below and the pocket screw kit instructions,
to attach the arms from the underside, instead of from the top of the arms. Use shorter screws, practice on scraps,
to be sure you don't screw through the top of the arms.
I need to use pocket screws to take off the arms parts G....just to get the chair out of my shop ! |
| |
|
|
| |
|
|
 |
|
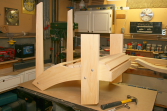
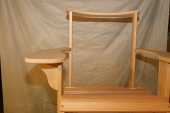
11
- Screw the arms G in place, as they rest on the front leg supports. Double check to be sure the
arms are parallel to the ground. If not using pocket holes, put 2 screws through the arms into front legs D, and 1 into supports F. They should overhang the
back edge of the front legs by 1/4" (6mm), leaving about 19 1/2" (49.6cm) between the arms. Put 2 screws
in from the inside of parts E,
into the notch at the back of the arm. Check to be sure the arms are parallel to the work surface. |
| |
|
|
 |
|
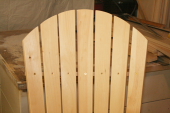
12 -
Remove the back seat slat N. The back pieces can now
be assembled, starting with the middle slat I, centered at the top on part H, and at the bottom, in the curve on part B. Extend the slat 1/4"(6mm) past part B, so the wood doesn't split. Mark
the vertical center of each slat and the horizontal center of H
& B, then screw in place at your hash marks. Pre-drilling the holes may be required
on some stock. I find it easier to level the chair as shown. I use 1/4" (6mm) spacers at the bottom, and 1/8"
+ 1/4" (3mm + 6mm) at the top. Check to be sure the top curve alligns. |
| |
|
|
 |
|
13 - If you are using
plugs to hide the screws, be sure to add them NOW, to the bottom of the back slats, and sand smooth. Then you can re-install part
N. |
| |
|
|
 |
|
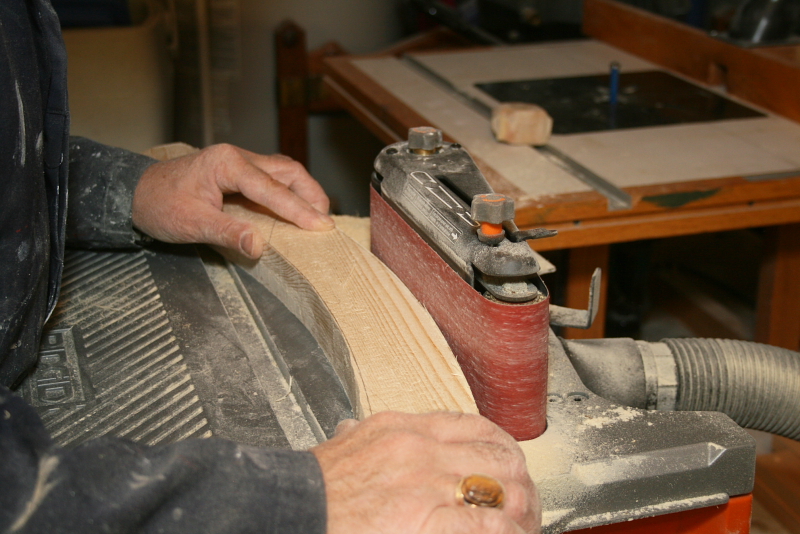
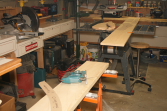
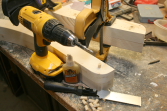
14 - Next you will
need to construct the 2 rockers parts O, dependent upon your tools and stock. I used 1 1/2" (3.8cm) Home Depot 2" x
10"s (5.1cm x 25.4cm), working around the knots. You may feel more comfortable up using 4 pieces of 3/4"
(1.9cm) stock, cutting each one out and pre-sanding prior to gluing up. I have a router table and 3" (7.6cm)
straight bit with roller guide. After attaching the template with two-sided tape on the rough cut stock, I used
the router to clean to the template edges as shown.
At this point you can make the parts full thickness, or reduce the bottom edge to the dotted line, so you can add
a 1/4" hardwood runner to the bottom of eah rocker. I used hobby board strips in poplar from Home Depot. |
| |
|
|
| |
|
|
| |
|
|
 |
|
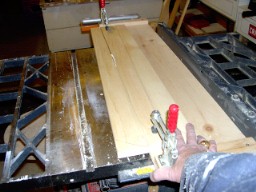
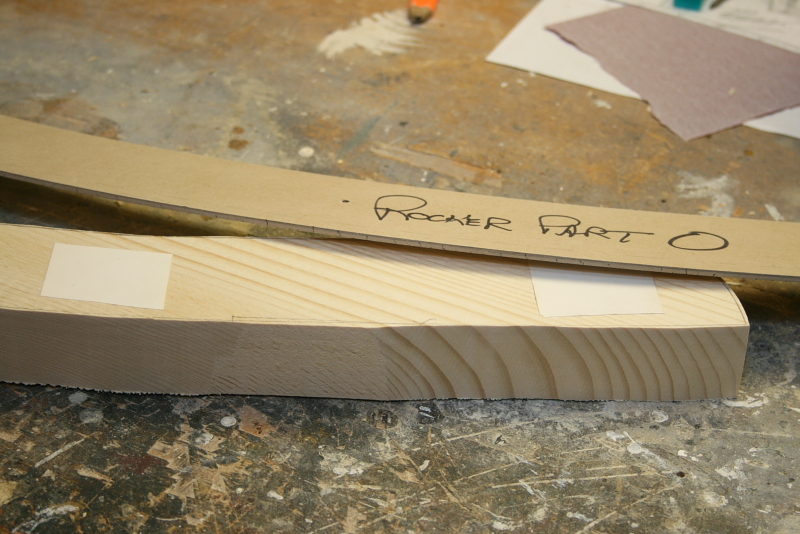
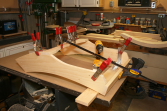
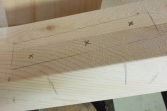
15 - Once all pieces
of the rockers are cut and presanded, glue up the stock into two rockers. Mark the screw positions from the holes
in the template on the inside
of each rocker. Using waterproof glue, laminate the stock, clamp and screw together until set using the 2"
(5cm) exteriors screws. Plug the screw holes and sand smooth. When sanding the tops of the rockers, note that the
template is flat after the curves at each end. The inside curvature begins after the flat areas where the legs
attach. This makes it easier for you to make the mated leg parts and attach to the rockers. |
| |
|
|
 |
|
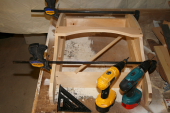
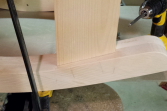
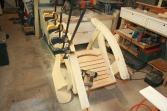
16 - Once you are comfortable
that both rockers are identical, place the chair on the rockers, set out 5" (12.7cm) from the front legs parts
D. They should
be close the the ends of the arms. Using a square adjust the positioning on the rockers to get the legs perpendicular.
You may need to sand or trim the under side of the front legs
and side panels to get the front legs perpendicular. You can
center the legs straight on the rockers, or angle the rockers in at the back like I have. |
| |
|
Page 3
|
| |
|
|
| |
|
|
| |
|
|
| |
|
|
 |
|
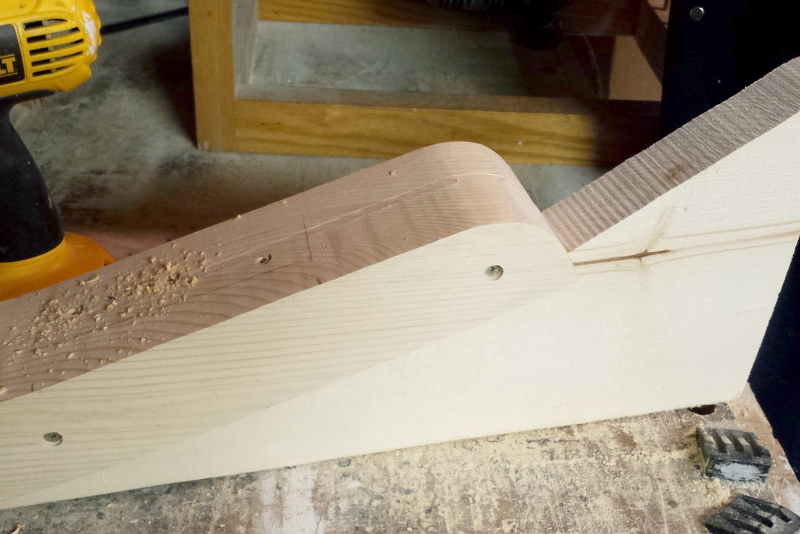
17 - Once the rockers
are mated in the position you want, mark a pencil line around each front leg part D and the back ends of parts A and E. This will give you a marking to drill pilot holes for the screws in the correct locations. |
| |
|
|
 |
|
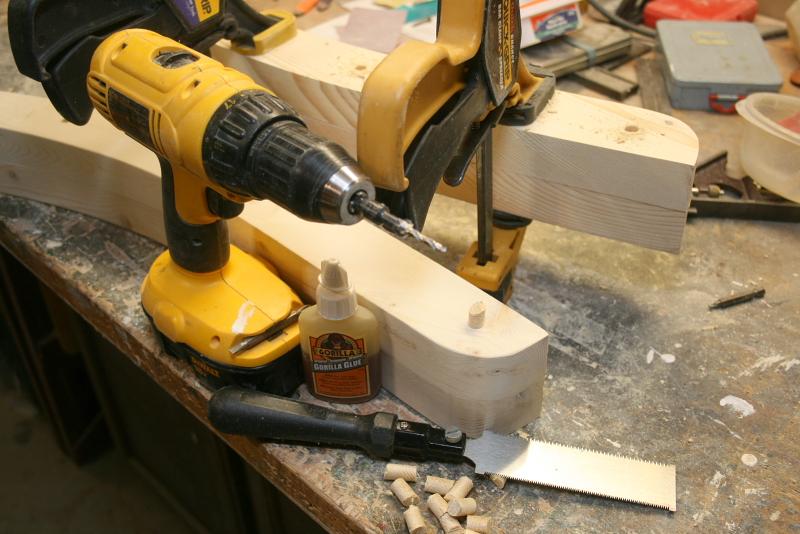
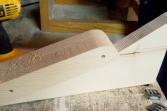
18 - Use a tapered
scrap cut off, as a support when drilling the pilot holes completely through the rockers. Be careful not to drill
on an angle, or the screws may penentrate the edges of the leg parts. An easy reference is pencil lines on the
rocker that align with the legs. You may need to extend the drill bit as far as possible, so it will penetrate
the bottom of the rocker. |
| |
|
|
 |
|
19 - Turn the rockers
over and drill for the plugs at both ends if you are not adding hard wood runners. |
| |
|
|
 |
|
20 - Line up the rockers
with the pencil marks at both ends and clamp the rockers firmly to the legs, with the other end of the clamp on
the seat slats. |
| |
|
|
 |
|
21 - Once in place,
screw the rockers in from the underside. Use four # 6 x 3" (7.6cm) screws for the back legs and three # 8
x 3 1/2" (8.9cm) for the front legs. Remove the rockers, sand off all pencil marks and reinstall the rockers
with waterproof glue on the underside of the legs. I found it easier to turn the chair over on the arms to install
the rockers. Project the screws through the rockers enough that the points fit into the holes in the legs, then
clamp tight and screw in place. If you are not adding runners, plug the holes now and sand smooth. Remember to
tighten the bolts on the front legs. |
| |
|
|
 |
|
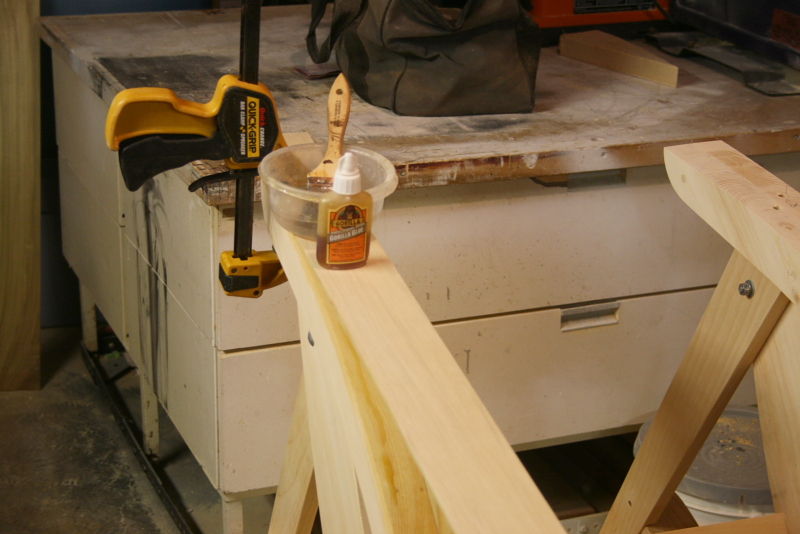
22 - If you are adding
1/4" (.6cm)
hardwood runners to the base of the rockers, trim the stock to the correct width, allowing for sanding the edges
once attached. Using waterproof glue, clamp the runner at one and and add clamps as you continue to the other end.
If you have a power stapler, it will hold better than nails. Otherwise, let the glue completely dry before removing
the clamps. It may be beneficial to soak the runners first, and temporarily clamp them to the rockers, to help
pre-form the shape. Once dry, trim off the ends and sand smooth. |
| |
|
|
 |
|
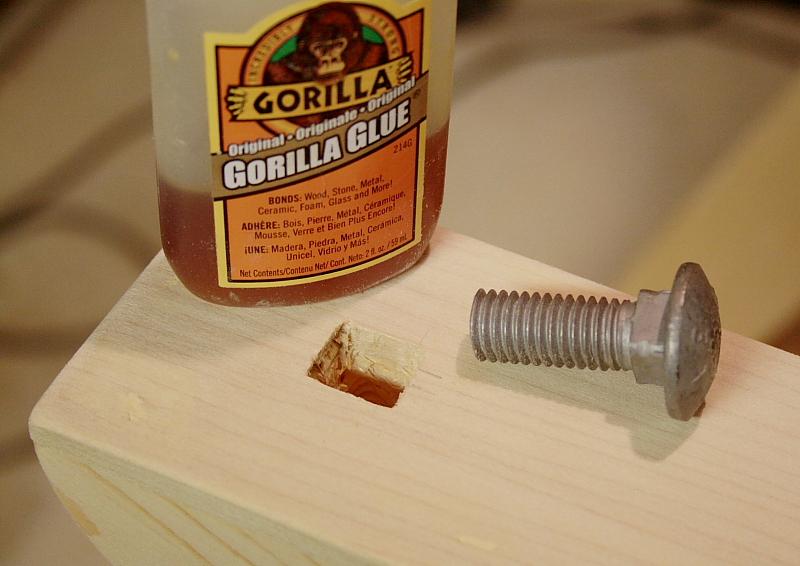
23 - If the front legs
are slightly off square like mine was, and the legs fit flush, you can add weight to the underside of the rockers
as a counter balance. I cut two 3" x 1/2" (4.8cm x 1.2cm) galvanized carriage bolts to 1 1/2" (3.8cm)
long, and glued them in holes at the back ends of the rockers. The chairs balanced perfectly, and the curved bolt
heads act as a safety stop, if the chair is rocked backwards too far. |
| |
|
|
 |
|
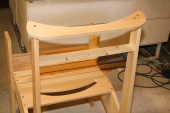
24 - The chair is now
assembled, and ready for finishing.If you are plugging the screw holes, I recommend a tapered plug cutter, like
the Veritas Cutter from Lee Valley Tools. Glue the plugs in place with exterior waterproof glue, let dry, then
cut off the excess with a chisel or Japanese saw. The rest can be sanded smooth with a random orbital sander. If
you are painting the chair, it is best to prime all surfaces first before assembly, to ensure longer life against
moisture. You can either countersink and plug the screw holes before final painting, or use brass screws left exposed
if staining. |
| |
|
Page 4
|
Enjoy!!!
Phil Barley
 |
www.plansinwood.com
|

|
|